HuskyCrates Setup Guide
Last Updated: v2.0.0RC3
These docs are currently a work-in-progress and are not yet complete. There may be sections referenced in the text that do not yet exist. Please see the support Discord if you need additional assistance.
Installing HuskyCrates
To install HuskyCrates, you'll need to download the plugin from its Ore listing. You will also need to download the latest version of HuskyUI, which can be found here.
Once downloaded, place both .jar files into the /mods folder of your server. Make sure you have a recent version of Sponge, otherwise you may run into problems. After a restart, you should be greeted by these files in your /config/huskycrates/ folder.
Apart from the folders, you have huskycrates.conf, which is basically where plugin-wide "settings" are controlled. You do not put crates in huskycrates.conf.
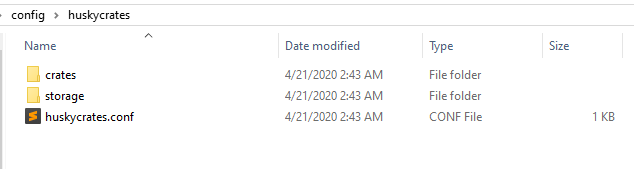
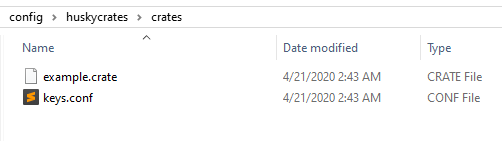
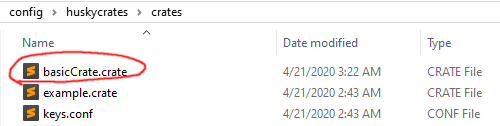
Inside of the /crates/ folder, you'll see these files. example.crate is an example crate file with some basic settings pre-configured for you. keys.conf is for advanced key configuration, which will be touched on later
Inside of /storage/, you'll find these files.
data.mv.db is the storage file for the local database HuskyCrates uses to keep track of keys and crate positions. You shouldn't need to edit this, but there might be a situation where you need to delete it.
dupealert.log is a text-based log of every duplication event on the server. You can use this to review reported key duplications, and potentially punish cheaters.
generatedinventories.conf is a list of inventories of items converted into valid item nodes with in-game commands.
generateditems.conf is very similar, except these are just singular valid item nodes generated with commands in-game.

Upon logging into your server, you should be able to run commands like /hc block example and /hc key example, as well as use this example crate in-game. If everything's working, you're in good shape.
Plugin Settings
Once done installing, check your settings in huskycrates.conf to make sure they're set to what you want.
forceCrateCMD=true
secureKeys=true
virtualkeydatabase {
    database=huskycrates
    host="127.0.0.1"
    password=""
    port=3306
    type=mysql
    useRemoteDatabase=false
    username=root
}
forceCrateCMD controls whether the plugin will force ownership over the /crate command. If you're running into incompatibility issues with other plugins, feel free to set this to false, otherwise leave it true
secureKeys controls whether the plugin will check if keys are duplicated or not. You typically shouldn't disable this unless you have a specific use-case where it's neccesary. If you're having trouble with false dupe reports, join the support Discord.
You should leave the virtualkeydatabase settings alone unless you know what you're doing. For experienced owners however, you can enable an external database by setting useRemoteDatabase to true, assuming you hadn't already figured that out. There currently isn't support for custom table names or anything, but that could come in a later update assuming the demand is there.
Your First Crate
For the sake of simplicity, we're gonna start off by using /hc gencrate to generate a template crate. Later on, I'll run you through the basics of writing configs yourself. For now, to help better demonstrate how the configs work, we'll be doing it in-game.
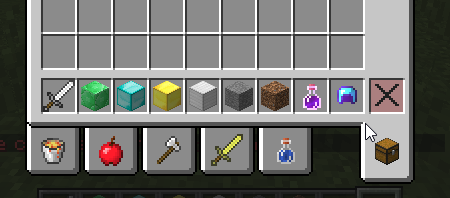
Start your test server, log in, and make sure you have the huskycrates.admin permission. If you don't, you won't be able to continue. Once you've sorted permissions, collect some items in your inventory. Here's what I collected. The helmet has Protection 1, and the potion is an Instant Damage potion. The sword has been renamed as "Cool Sword".
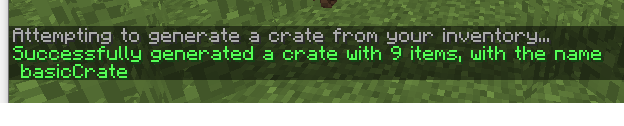
Now that I have my items, I'll run /hc gencrate basicCrate inventory. You could replace inventory with item if you wanted just the held item to be in the crate, but this is much faster for various custom items.
Feel free to run /hc reload at any time to test your generated crate with the /hc block and /hc key commands. Seeing it in action will help better understand the text in the configuration file as we continue. You do NOT need any permissions to use a crate, just keys. This may change in a later version if requested enough.
Here's the output of /hc gencrate for me. First in chat...
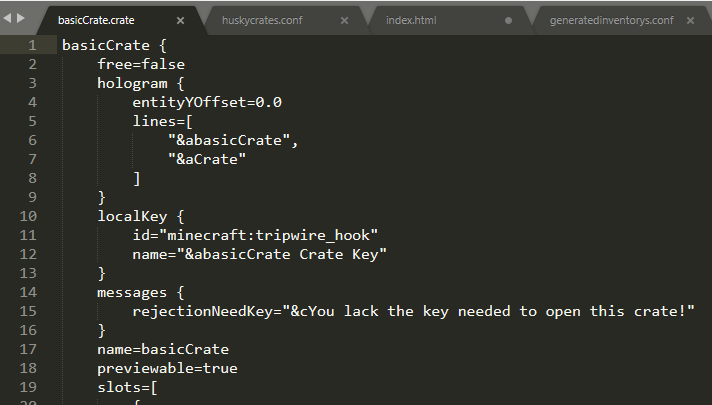
Then in /config/huskycrates/crates/. You can see it created basicCrate.crate for us.
Opening that, we'll see a very long file that looks something like this. at the beginning
/hc gencrate and other gen-prefixed commands are very liberal with how they store item data. We will see a lot of duplicate data throughout the config. This is not neccesary for you to do when typing your own configs up manually, as anything within a nbt { } node will be overriden by HuskyCrate's item node options.
Now is a good time to run through most of the notable parts of the crate configuration file format, so let's do that.
free controls if the crate can be used for free (without a key) or not. You can enforce a cooldown (in seconds) between crate uses by adding cooldownSeconds=#, where # is the number of seconds between possible uses.
Inside of hologram { }, we find lines=[ ]. You can edit the existing lines to your heart's content. If you want to add a line, you need to add a , after the last quoted hologram text, then (in quotes) add your next line.
For example, the yellow highlighted text here is what you would add following my instructions.
lines=[
    "&abasicCrate",
    "new line"
]
You should keep this formatting in mind when adding to any nodes with [ ] square brackets. These are referred to as "arrays" or "lists".
An important part of your crate is the localKey, at least for now. This node follows the item node layout, so any items you generate with /hc genitem should work here just fine. name and id are fairly self-explanatory.
The next major note would be previewable. If you want users to be able to right-click (or punch) your crates to get a preview of all of your rewards, you would want this set to true. Otherwise, if you want to prevent this, set it to false. There is no permission required for this.
Scrolling past the long list of items, you'll find useLocalKey. You should keep this true for now. We'll cover advanced key configuration later.
Within viewConfig { }, you'll find a variety of attributes and values. As generated, the three options are for the spinner viewType.
tickDelayMultiplier is how much to multiply the current tick delay by. The delay starts at 1 tick per shift of the spinner items. Every time the spinner moves, the delay is multiplied by tickDelayMultiplier to slow the spinner down. Every tick is roughly 50 milliseconds, so tickDelayMultiplier=1.025 would result in ticks roughly a third of a second long before stopping at ticksToSelection=75 ticks. These two numbers are the main deciding factors in how long the spin animation of your crate takes.
ticksToSelectionVariance defines by how much to relatively adjust your ticksToSelection by every time the crate is used in either the negative or positive direction. Set this to 0 if you want to have a consistent spin time.
Now outside of the viewConfig { } block, the only option left is viewType. Currently, the only supported viewTypes would be spinner, which is the normal spinning item view, simple, which just shows the user what they won without any sort of prior animation, and instant, which has no inventory view and just randomly selects a slot.
Please note that the server will not error if you configure your viewType as roulette, but the view type is currently not finished. It will simply tell users that the view type is not yet supported and do nothing. Don't use the roulette view type yet.
Now, we're onto the more complicated part.
Slot Configuration
Every crate has slots. Think of a crate like a slot machine. The wheels spin before landing on a particular icon, or in this case, slot. While most slot machines have 3 or more "wheels", we only have one, hence "spinner". Our slots are our items we put into our inventory earlier.
Before we dive into the intricacies of the item node format, let's touch on how HuskyCrates handles rewards and random slot selection.
Once a user's key has been consumed, the result of a crate spin has already been selected (the spinning is just for show, as you probably figured). How things appear to the user depend on your configuration earlier, but how often items are selected depends on chance. I don't mean random chance though, I mean weighted chance.
The chance attribute defines how "heavy" a particular item is. Heavier items appear more often than lighter items. The bigger the chance value, the heavier an object is, and vise versa.
If you want to calculate the actual probability of getting any given item out of your crate, add up all of your slot's chance values, then divide whatever slot you want to test's chance value by that sum. Then, multiply by 100. That gives you the theoretical percent probability of getting that item on any given spin.
Moving onto what players get for spending keys, we have rewards. For the sake of simplicity, we will be assuming that we only want to give out all of the rewards in our slot. I'll cover random reward selection later.
By default, our rewards=[ ] array on every slot is this.
rewards=[
    {
        type=item
    }
]
If we wanted to add another, we could do that like so.
rewards=[
    {
        type=item
    },
    {
    	type=servercommand
    	data="say Hello server!"
    }
]
I'm sure you noticed I used a different type there. There are 5 types we'll be going over here. item simply gives the user the displayItem of the slot. servermessage sends a message to the server, servercommand runs a command as the server, usermessage sends a message to just the user who won the reward, and usercommand forces the user to run a command. All of these with the exception of item use the attribute data as their value.
As you can see in the example above, I'm telling the server to both give the player the displayItem, as well as telling the server to run say Hello server! as the console.
Does it look like there's a bunch of text missing? Well, there is! I'm not done with the docs, so I'm really sorry if you're stuck at this part. Please see the support Discord if you need more help.